Showing posts with label fourth grade. Show all posts

Monday, July 10, 2017

In the Art Room: Celluclay Taxidermy Creatures!

Y'all, I know. You don't even have to tell me: these are the ugliest things I've created to date. When I showed the hubs the creation on the right, he said, "that thing is scary. Like really scary." This coming from a dude who lives for haunted attractions. Mission accomplished. 

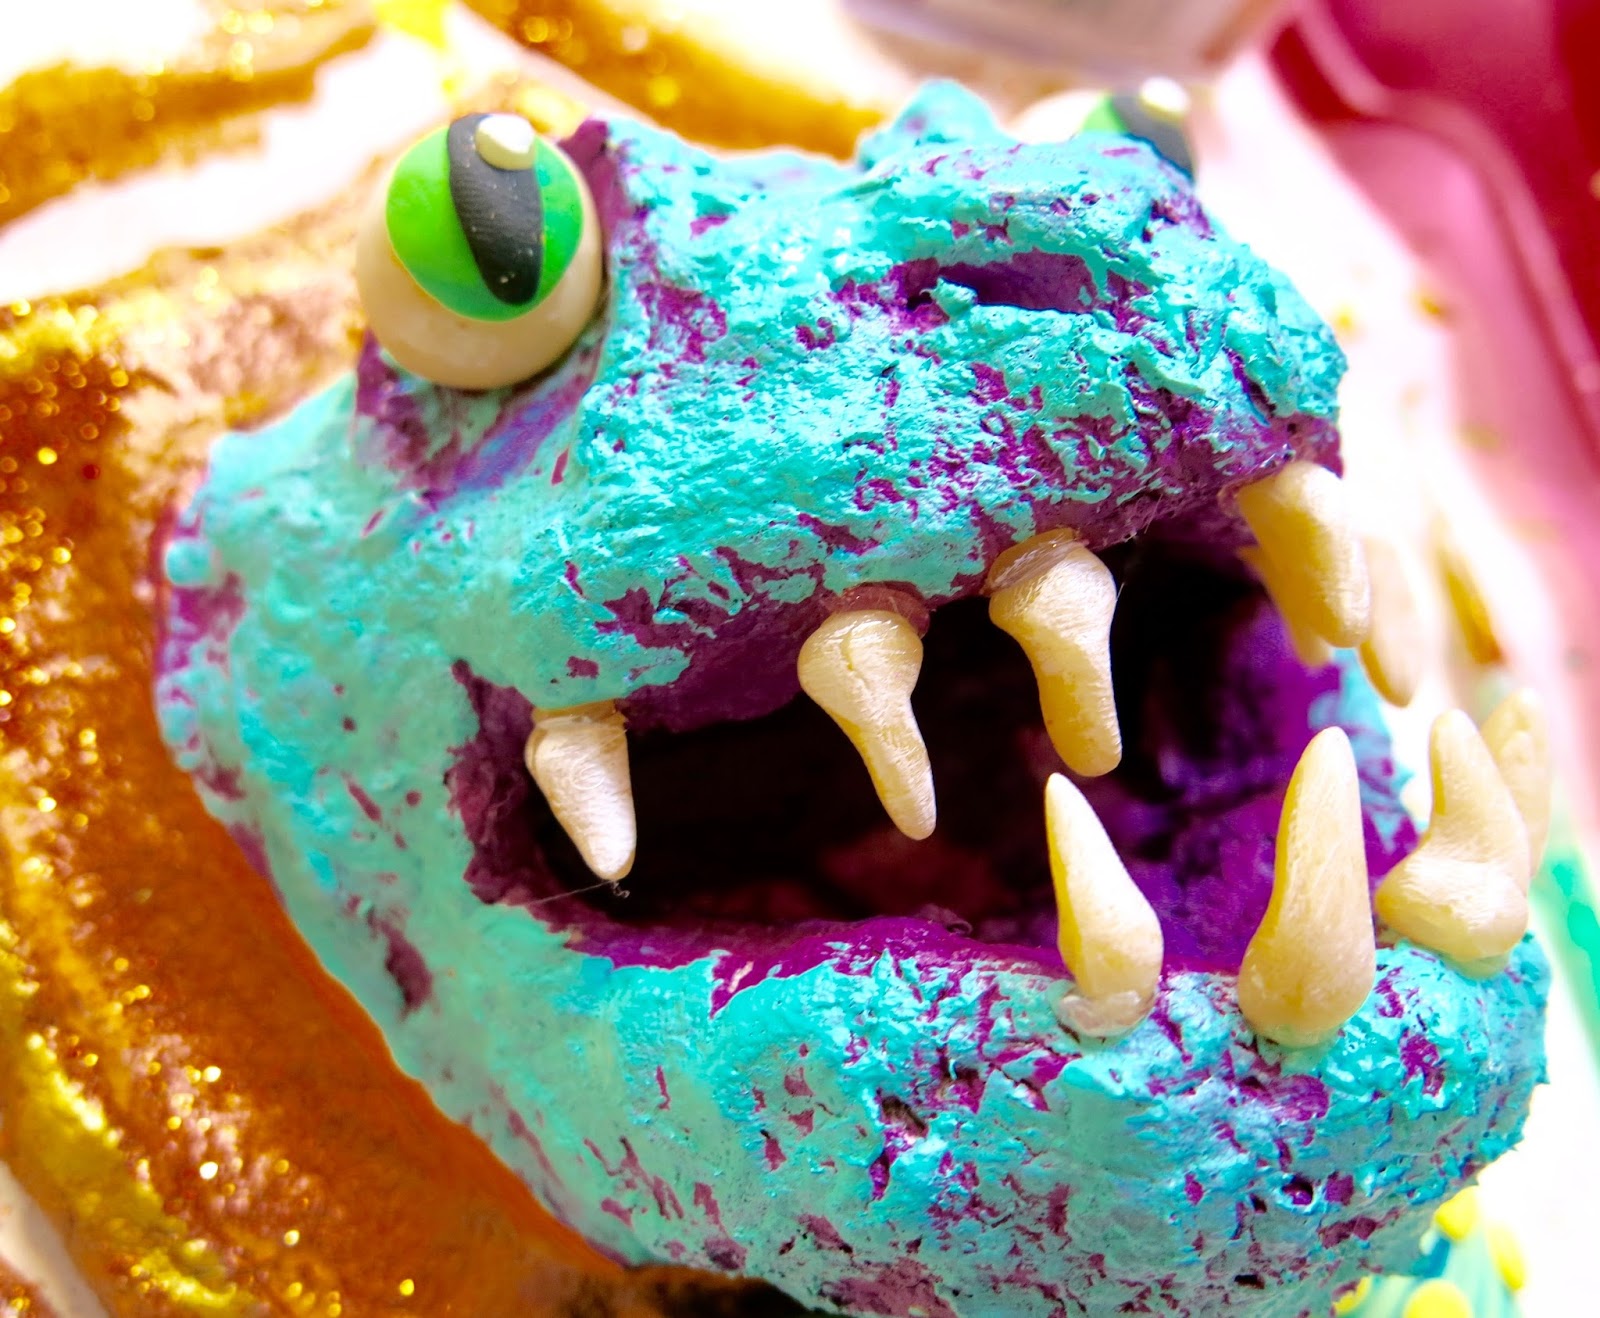
I got the idea for this Celluclay project when I hosting my #creatingwithcassie craft nights over on Facebook live. It is similar to a project I did when writing my book except with that project, I used air dry clay and created cute little forest animal heads. With this one, I used Celluclay and made these ugly/cute bad boys. How to here:
Supplies: 

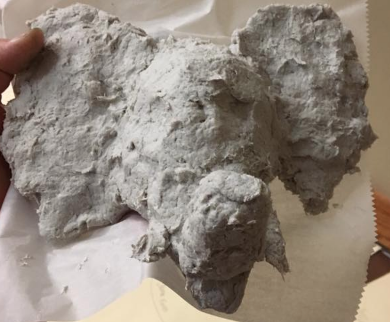
* Celluclay: To say I am obsessed with this stuff is an understatement. I love me some Celluclay every since discovering it when writing my clay book. For a grade level of 80 kiddos, I'd say you'd need 2-3 bags of the 5 lb. of clay. I always premix the clay, I never let the kids do this. It's very dusty and, with a group of kids, could get real insane, real quick. I like to mix mine up the day before, creating batches the size of a large grapefruit for every two kids. I then wrap the clay in plastic wrap and store in the fridge so as not to mold. The next day, I place in a bowl and let the kids unwrap the clay.

* Water: For mixing the clay. Don't ask me about measurements. This stuff should feel like clay. Not to soggy, not too dry. 

* Cardboard for Wall Mount: This project is geared towards kids in middle school and beyond. I'm guessing they will be able to cut through cardboard. Chipboard and mat board would work just as well. 

* Aluminum Foil: The Dollar Tree sells packs of 30 sheets of aluminum foil. I love this! The stuff is already cut for you. I will say, it's a very thin foil. You and your students may have to use more than one sheet to build a strong armature. It will need to support the weight of the clay.

* Paint: I used acrylic but tempera would work. I always cover my Celluclay pieces in a varnish like ModPodge to seal and protect. 

* Polymer Clay: Totally optional! I used this to create the eyes and the teeth. I thought the difference in texture would be fun. 
 This guy is small, only about 6.5" in height. What I love about this project and working with Celluclay:

1. You don't have to wrap your project to prevent from drying when class is over or you need to take a break. Allow your clay to dry out. You can simply work the wet clay back into the dry. YES!

2. It sticks to everything! Seriously. I've adhered this clay to plastic, cardboard, tagboard, foil and plaster and I've never had to bust out the hot glue gun. 

3. For that reason, no need to slip and score! Yippie!

4. I love the rough texture it creates. However, if that is not your bag, then good news, you can sand the clay once it's dry. Use a fine grit paper and do this either outside or wearing a cute lil paper mask thingie. 
 I always and forever, amen dry my Celluclay in front of a fan. It can dry super fast that way. Otherwise...it may take much longer to dry and mold. No one wants that. 
I've used both the white and the gray clay. Both take to paint very well...so no reason to purchase one over the other. 
Because the Celluclay sticks to everything in the universe (in the best possible way), you can use such things as air dry clay in combination. We found that out while I was leading a clay session at Art Scouts (details on that amazing adventure later this week!). The participants were adding tooth-shaped clay right into their masterpieces while it was wet...the next day, they were stuck in to place. 
 I also shared this process during my online craft nights. I LOVED seeing everyone's spin on this project. Imagine where our students could go with this idea. This amazing unicorn was created with plaster trips instead of Celluclay...which works just as well! 
 Here are just a few of the incredible creations I managed to snag a picture of at Art Scouts. Love this elephant! 
 And this dragon! At Art Scouts, I had about an hour for the participants to create an armature and make their masterpiece. Pretty impressive that they could knock it out so fast. The method I share in the video makes it a simple process. Once home, the Art Scouts started sending me photos of their finished pieces. 
 Love this one by Polly Blair. Notice she did not cover her cardboard in Celluclay. Totally optional. It really giver her piece a great contrast between the smooth wall mount and the rough texture of the dragon. 
 And this cutie from Jennifer Day. That face is a total crack up. 
Here's a peak at the other clay creations our Scouts knocked out in just two hours! These were created by my Joliet pal Nora Gleason. The heart was created with Celluclay while the wings were made with plaster trips. You can find that project here
 And these cuties created by Ryann Hawkins. LOVE them! I can't wait to share more from our Art Scouts adventures in a future post. Until then, I leave you with these faces only a mother could love...
Ah! I failed to mention that the "retainer" on the dino on the left was created with an unfolded paperclip and attached with hot glue. The cat eye glasses were some I had in my stash where I just removed the legs and attached to the bridge of the nose with hot glue. The bowtie on the dino on the right, was created from polymer clay and simply attached to the finished piece with hot glue. Now...where to hang such craziness. My art room, of course! 
 photo signature_zpsd10b3273.png
Read more »

Sunday, June 25, 2017

Published in a Magritte Activity Book!

Last winter I was contacted by Liesbeth Elseviers who is an editor of children's books in Belgium. They were working on a fun Magritte activity book for children to celebrate an upcoming exposition on Magritte's work. Liesbeth had seen one of my Magritte lessons on this here blog and asked if it could be featured in the book. I happily agreed and then promptly forgot all about the book. Until it arrived on my doorstep from the Netherlands. Look how absolutely stunning this book is!
 A few months ago, when Liesbeth sent me the page proof, I was blown away. She and her team really did a beautiful job with the layout and design of the book. Flipping through the pages, each page is a work of art with a large variety of Magritte-inspired art activities for kids. 
 The book is in English as well as French and Dutch. 
 Isn't it a beauty? Y'all can check out my Magritte-inspired projects here, our mural here and my Magritte costume here
 I thought I would share a little flip through so you can see all that the book has to offer. It would be a great book for kids to use independently, for teachers to use as a teaching tool and sketchbook inspiration. 
I love activities that give the kids quiet sketch time. Telling them the story of how Magritte came up with his surrealistic ideas would be a great jumping point for our kids to come up with ideas outside the box. 
So much inspiration here! I'm thrilled and honored to be apart of such a beautiful book based on such a wonderful artist. 
So where can you get your copy? Currently the book is only available to friends in Belgium and The Netherlands. You can purchase here. If interested in overseas shipping, try contacting the folks here. The book will be available in the land of Oz at the Australian Museum of Modern Art. 

 photo signature_zpsd10b3273.png
Read more »

Wednesday, June 14, 2017

In the Art Room: Sew a Softie!

I was recently contacted by the author of Sew Together, Grow Together, Trixi Symonds. She's the founder of Sew a Softie (check out the #sewasoftie on Instagram for some fun inspiration!) and has a fun sewing opportunity coming up in the month of July. I'm definitely joining the fun...and I thought you might want to as well. 
Trixi lives in Sydney, Australia where she has been teaching hand sewing to children for over 20 years. She coordinates workshops and leads sessions at galleries, bookstores, schools, you name it. Her goal is to encourage adults to share the love of stitching with children by providing cute, creative and fun sewing tutorials. Are you sold yet? I love her already! 
Trixi came to me with her idea of making July Sew-a-Softie month and asked if I'd be interested in joining the fun. Of course I agreed...and thought y'all might want to as well. Here are the details from Trixi:

The aim of Sew a Softie is to show both adults and kids that hand sewing is fun, creative, fulfilling, and that absolutely everyone can do it. Throughout the month of July simple to sew softie tutorials will be posted daily online. You can find them on the Sew a Softie Facebook page, the Coloured Buttons blog and the Sew a Softie website. Also, check out colouredbuttons on Instagram

You could take part by posting a softie tutorial and join the blog hop or by sewing softies with a group of friends or students anytime in July and posting on Instagam with the tag #sewasoftie.

Thanks, Trixi! I know I'm excited to get started.
I mentioned that Trixi is a book author, you can find her book here!
To clarify, if you want to join the Sew a Softie fun, be sure to follow Trixi's Facebook page. There you can find daily softie sewing inspiration as well as share your own ideas and creations. If you share on Instagram, don't forget to use #sewasoftie. I know I'm looking forward to lots of new tips, tricks and sewing project ideas for my students. 
Doesn't this sound like fun? For more inspiration, be sure to check out Trixi's blog and Instagram. It's sure to get your wheels turning. These cute images are from there. 
I know my students absolutely love sewing and had a blast with our Stitched Monster project. I think this will be a fun way to gain new ideas and collaborate with hand sewing enthusiasts all over the world. I hope you'll join the fun!

 photo signature_zpsd10b3273.png
Read more »

Tuesday, April 25, 2017

In the Art Room: Bobble Head Pets UPDATE!

BRACE YOURSELF FOR THE CUTE. This is just a handful of the Bobble Head Pets that my fourth graders created and each one is so stinkin' adorable! If I had any patience at all, I would have waited until the next crop of cute was unloaded from the kiln before blogging but I just couldn't wait (one being fired now has a monocle and a top hat while another has a spiked collar...I'll just have to do a follow up post to this here follow up post)! The kids loved this project...and the results from each are just precious. 
We learned some things along the way: keep the point at the top of the body very pointy as that helps the head rotate and bobble better. Glazing both the inside of the head and the top of the point also makes for a better bobble. 
These creations took us three one-hour art classes to create. On the first day, we made the body. MANY of the bodies were so thick that I just KNEW they were going to explode in the kiln...but none of them did! Stay tuned for a long overdue Art Teacherin' 101 this week on my fave clay tips and I'll share with you how I prevented explosions. 

On the second day, we made the head. With extra time and extra clay we made doggie dishes, toys, mice for our cats, you name it, they created it. On our final day, after a bisque firing, we glazed! Here's the demo video I created and used. Feel free to use in your art teacherin' adventures! 
This lesson was also shared in my book! You'll have to buy the book to see just what animal I made bobble.
You can pick up your book here...keep in mind that the release date isn't until June. A fun summer surprise in your mailbox, ha! 

All the projects in my book were created with air dry, oven bake or homemade clay...but many of them could be done with kiln fired clay, like this project! I'll be exploring all kinds of clay projects next month during my LIVE craft nights! You should join the fun, you can create with ANY clay. But I'll be exploring a variety of air dry, plaster and homemade clay...
Pick up your clay kit here and get ready to craft with me LIVE on Facebook at 8 pm CST next week! 

So, true facts: not all of the heads bobble freely. Many of them are pretty stationary. BUT...the kids are having so much fun gently rotating the heads and getting them to tilt just like a real pup or kitten. Just moving them a little totally changes the look of the sculpture!
 Many of the kids created their beloved pets. 
 We use Mayco's Stroke and Coat. I give the kids EVERY color in the rainbow because, well, who doesn't want to have a lot of options. I picked up tons of ice cube trays from the Dollar Tree and put a different color in each slot. I labeled each slot on the tray so that the kids would know what color they were using since the colors can change so drastically in the kiln. I encourage at least three coats of glaze for just the right amount of shine. We also have our dog dishes (ha!) of water and sponge for cleaning brushes. I recently had a teacher ask how I teach the kids not to mix colors. I usually do something like this: DON'T MIX THE COLORS! And that works. 
Seriously, my kids have been painting since kindergarten. They know that we always keep our paint brushes pointy by painting with just the tip; we always clean our brush in the water and dry on the sponge before changing colors. It's rare that I have kids mix colors...especially my older students. I encourage pride in artwork and I think they know that taking care of art supplies will create a beautiful masterpiece. 
And, again, I say: DON'T MIX THE COLORS! Usually one talking to and explanation as to why we don't do that does the trick. And, if all else fails, take the paint away. If you can't use the supplies correctly, so sorry, you are done for the day. 
 Rant over! Back to the cute.
As y'all know, we are having a pet shop theme for our art show. These guys are in charge of the cats and dogs. Now we just have to work on transforming the art room into a pet shop! We have some ideas cooking about how to make that happen. 
These kids have made so many 3-D works this year: bobble heads, candy hearts, sewn monsters! They are going to dominate at the art show. 
 I swear their eyes follow me around the art room!
 Have y'all done bobble heads before? What did you do differently?
Until next time! 
 photo signature_zpsd10b3273.png
Read more »

Monday, April 10, 2017

In the Art Room: Stitched Monsters, Update!

Now that Clay Week(s) has come to an end, it's back to business as usual in the art room. In order for all of my kids to work with clay at once, I have the kids "push the pause button" on whatever we are currently working on. That means, after clay week, we un-pause and resume what we left behind. For fourth grade, that meant our Stitched Monsters! Here is the lesson video I created for this project. Feel free to use in your art teacherin' town!
Out of all the projects we have done this year, my kids have ranked this one very close to the top. Clay was a first place winner, of course, but it was a tight race. Many of my students have started sewing at home, bringing in their pillows, monsters and other creations. I remember when I was first introduced to hand sewing as a kid. It felt like a whole new world of creating was opened up to me. I think the kids are feeling the same. 
 I really liked having the kids use Smart Fab for the body as this made it easy for them to see thru and insure they were "capturing" the arms and the legs of the monster as they stitched. Once the stitching was complete and the monster was flipped to the correct side, if they noticed that part of their arm or leg was not securely attached, the kids had to go back and restitch. This really taught them the importance of good, even stitches. 
Once flipped, the kids had to complete a sketch of their monster. This sheet asked them questions about their monsters to really get their creative juices flowing. Once the sketch was done, they were to slide a card into their monster, cut the shapes of the face and glue them down with tacky glue. The card inside made it so the monster would not be glued together. 
Not until the kids started stuffing their monsters did they really seem to understand that they were creating a stuffie. One told me he was going to go home, make a bunch and sell them. Right on, dude! I had many requests to take them home today...but I need them for the art show! Give me a month, y'all.
Have y'all done stuffed monsters with your kids? I know there are may ways to go about making them. 
 Earlier this year, one of my sweet students gave me a small stuffed monster with a rectangular body and dangling arms and legs. That look is what I based this pattern on. 
Learning to sew monsters this way taught my students how to properly pin, stitch and create a monster. I definitely think this is a lesson worth repeating! 
Love to hear about your students stitchery projects! 
 photo signature_zpsd10b3273.png
Read more »